
Updated July 2025 to reflect minor updates to Adobe since this post was last updated in August 2022.
We have less and less printed drawings on our desks these days. In most cases it is just easier to look at the latest revision on the screen. But, what happens if you need to measure off the drawings? Perhaps you are preparing a project description and want to provide some detail about the size of the building. Or you are undertaking an assessment and want to discuss the separation distance to a neighbouring property. How do you get around the need to print off plans just to use a scale rule?
Did you know you can digitally measure off plans with Adobe? Even basic Adobe Reader will do it. This post describes it in five easy steps – which are exactly the same steps which you already do when you use a scale rule and a hard copy of the drawing.
Before we get started, here are some important points to note on using this tool:
Note 1: As with scaling off paper drawings, do not rely on the Adobe Measure tool if you are obtaining a measurement which requires absolute accuracy e.g. where compliance with a rule is marginal or when drafting a condition which specifies a dimension. In these circumstances you should ask the drawing author to measure it for you.
Note 2: Scaling off will only work on drawings generated in CAD, it will not work on hand drawn plans or scans of CAD drawings (as these are no longer in scale with the required data embedded).
Note 3: Get more information from Adobe’s relevant help page here (go to subsection Measure the height, width, or area of objects ).
Step One: Get the drawing and identify its scale
- Open the drawing in Adobe.
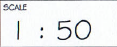
- Find out what scale it is in by reading the scale specified on the drawing e.g 1:100, 1:500.
Step Two: Get your scale rule
- If you don’t see the Measure Objects icon (a purple rule) on the All Tools menu expand ‘view more’ or use the search box to find the Measuring Tool.
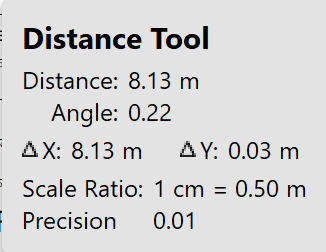
- Click on the Measuring Tool to turn it on. Turning on this tool will bring up two boxes normally on the right. One as shown in the image below will allow you to choose which measurement type you want i.e. do you want to measure Distance, Perimeter or Area (plus Snap Types which are discussed later in this post). The other box which opens automatically has the heading ‘Distance Tool’) and this will show the measurement results (and also shows the scale ratio the Measuring tool is currently set on).

Step Three: Turn your scale rule to the right scale for the drawing
- Hover your cursor over the drawing.
- Right click and choose the top option Change Scale Ratio and Precision.
- Enter the scale ratio in the dialogue box. For example for 1:100 set 1cm=1m, for 1:500 set 1cm=5m.

Example: Scale Ratio setting for 1:50 scale (1cm = 0.5m)
Click the handout to see a table with common scale ratios: How To Handout: Measure off drawings (Note I haven’t updated the rest of this handout but the scale ratios in Table 1 will still be valid.)
Step Four: Verify
It’s always a good idea to verify you have it right by measuring something on the drawing which has a labeled dimension. If you measure it (see Step 5 below) and it is the same as the labeled dimension, then you know you have it right. If not, re-check Step 3 above, or trouble shoot at Adobe’s relevant help page here.
Step Five: Measure
Tip: Zoom in to the area you are measuring so you can place the cursor more precisely to get a more accurate measurement. Ensure this doesn’t affect the scale.
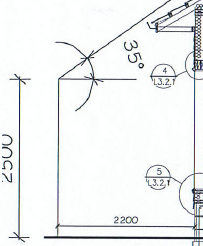
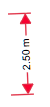
- Simply click at one end of what you want to measure and double click on the other end of it – you will see a red arrow at each end with the measured dimension in between. It will also appear in the box (see image below) showing the distance between the two points in the right scale.
Snap Types
Tip: If what you want to measure is already shown by a line on the drawing, for example a wall or site boundary, you can use the Snap tool. These help you capture the measurements of any lines on the drawings more accurately. As a planner I find that the architect has already dimensioned many of these lines, I tend to be measuring distances not shown by an existing line, e.g. between two elements which are not related such as a tree and the boundary.

And that’s it. Scaling off electronic drawings without the need to print. No wasted paper. No walking to the printer. It works for you and the environment.
If you found this post helpful, check out our other quick tips in the How To’s Category on the blog.
Happy measuring. The trees thank you.

Good information about laptops. Lucky me I ran across your site by chance.
I’ve book-marked it for later!
LikeLike
thank You!
LikeLike